DIY Front Porch Roofs: A Comprehensive Guide to Building Your Own
Adding a roof to your front porch is a fantastic way to enhance your home’s curb appeal, protect yourself and your guests from the elements, and create a more inviting outdoor space. While hiring a professional is always an option, building your own DIY front porch roof can be a rewarding and cost-effective project. This comprehensive guide will walk you through the process, from planning and design to construction and finishing touches. Whether you’re an experienced DIYer or a beginner, this article provides the knowledge you need to successfully build a DIY front porch roof.
Why Build a DIY Front Porch Roof?
There are several compelling reasons to consider a DIY front porch roof project:
- Cost Savings: Labor costs can significantly increase the overall price of a porch roof. By doing it yourself, you’ll save a considerable amount of money.
- Customization: A DIY front porch roof allows you to tailor the design and materials to perfectly match your home’s style and your personal preferences.
- Personal Satisfaction: There’s a great sense of accomplishment in building something with your own hands.
- Increased Home Value: A well-built front porch roof can increase your home’s value and make it more attractive to potential buyers.
Planning and Design
Before you start swinging a hammer, careful planning is essential. This stage involves determining the style of your roof, obtaining necessary permits, and gathering the right tools and materials.
Consider Local Building Codes and Permits
Always check your local building codes and regulations before starting any construction project. Most jurisdictions require permits for structural changes to your home, including adding a DIY front porch roof. Obtaining the necessary permits ensures your project meets safety standards and avoids potential fines or legal issues down the road. This step is crucial for a successful DIY front porch roof build.
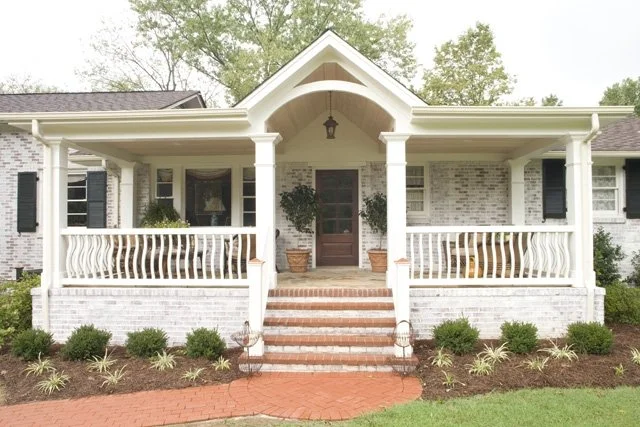
Choose a Roof Style
The style of your DIY front porch roof should complement your home’s existing architecture. Some popular options include:
- Gable Roof: A simple and cost-effective design with two sloping sides that meet at a ridge.
- Shed Roof: A single-sloping roof that is easy to build and ideal for smaller porches.
- Hip Roof: A more complex design with sloping sides and ends, providing a more visually appealing look.
- Awning Roof: A smaller roof that extends out from the house, providing shade and protection from rain.
Measure and Sketch Your Design
Accurate measurements are crucial for a successful DIY front porch roof project. Measure the width and depth of your porch, the height of your house, and the desired pitch of your roof. Use these measurements to create a detailed sketch of your design, including the dimensions of all structural components. Consider using design software for a more professional and accurate plan. Having a solid plan will make building your DIY front porch roof much easier.
Material Selection
Choosing the right materials is essential for the durability and longevity of your DIY front porch roof. Common materials include:
- Lumber: Pressure-treated lumber is recommended for framing due to its resistance to rot and insects.
- Roofing Materials: Asphalt shingles, metal roofing, and wood shakes are all viable options. Consider the aesthetics of your home and the local climate when making your selection.
- Fasteners: Use galvanized nails and screws to prevent rust and corrosion.
- Flashing: Flashing is essential for preventing water damage where the roof meets the house.
Construction Process
With your plans and materials in place, it’s time to start building your DIY front porch roof. This section provides a step-by-step guide to the construction process.
Building the Frame
The frame is the foundation of your DIY front porch roof. It consists of posts, beams, and rafters. Begin by setting the posts, ensuring they are plumb and securely anchored to the ground. Next, install the beams, which will support the rafters. Finally, attach the rafters, spacing them evenly and securely fastening them to the beams and the house. A solid frame is paramount for a lasting DIY front porch roof.
Attaching the Roof Sheathing
Once the frame is complete, cover it with roof sheathing. Plywood or OSB (oriented strand board) are common choices. Cut the sheathing to size and attach it to the rafters using nails or screws. Ensure that the sheathing is properly aligned and securely fastened. This provides a solid base for the roofing material for your DIY front porch roof.
Installing Roofing Materials
The next step is to install your chosen roofing material. Follow the manufacturer’s instructions carefully. Start by installing a layer of underlayment, which provides a waterproof barrier. Then, apply the roofing material, overlapping each piece to prevent leaks. Pay close attention to detail and ensure that all seams and edges are properly sealed. This is a critical step in ensuring the longevity of your DIY front porch roof.
Adding Flashing
Flashing is essential for preventing water damage where the DIY front porch roof meets the house. Install flashing along the roofline and around any penetrations, such as chimneys or vents. Use a sealant to create a watertight seal. Proper flashing is essential for protecting your home from water damage.
Finishing Touches
With the roof structure complete, it’s time to add the finishing touches that will enhance the appearance and functionality of your DIY front porch roof.
Install Gutters and Downspouts
Gutters and downspouts are essential for directing rainwater away from your home’s foundation. Install gutters along the edge of the roof and connect them to downspouts that discharge water away from the house. This helps prevent water damage and erosion. Consider the aesthetic of your house when choosing the style and color of your gutters for your DIY front porch roof.
Add Trim and Paint
Adding trim around the edges of the roof and painting or staining the wood can significantly enhance the appearance of your DIY front porch roof. Choose trim that complements your home’s style and paint or stain it to match the existing color scheme. These finishing touches can make a big difference in the overall look of your porch.
Lighting and Ceiling Fans
Consider adding lighting and ceiling fans to your porch for added comfort and functionality. Install outdoor-rated light fixtures to illuminate the space and ceiling fans to provide a breeze on hot days. This can make your porch a more enjoyable space to relax and entertain. Think about adding string lights to make your DIY front porch roof even more inviting.
Safety Considerations
Safety should always be a top priority when undertaking a DIY front porch roof project. Here are some important safety tips:
- Wear appropriate safety gear: Always wear safety glasses, gloves, and a hard hat when working on a construction project.
- Use ladders safely: Ensure that your ladder is stable and properly positioned. Never reach too far or work on a ladder in windy conditions.
- Work with a partner: Having a partner can make the project safer and easier.
- Be aware of your surroundings: Watch out for overhead power lines and other potential hazards.
- Take breaks: Building a DIY front porch roof can be physically demanding. Take breaks to avoid fatigue and prevent accidents.
Troubleshooting Common Issues
Even with careful planning, you may encounter some challenges during your DIY front porch roof project. Here are some common issues and how to address them:
- Leaks: If you experience leaks, check the flashing and roofing materials for damage or improper installation. Seal any gaps or cracks with caulk or sealant.
- Sagging roof: A sagging roof may indicate a structural problem. Inspect the frame for damage or inadequate support. Reinforce the frame as needed.
- Wobbly posts: Wobbly posts may indicate that they are not properly anchored. Ensure that the posts are securely fastened to the ground and properly braced.
Conclusion
Building a DIY front porch roof is a challenging but rewarding project that can significantly enhance your home’s appearance and value. By following the steps outlined in this guide, you can successfully build a beautiful and functional roof for your front porch. Remember to plan carefully, obtain necessary permits, use quality materials, and prioritize safety. With a little effort and skill, you can create a stunning DIY front porch roof that you’ll enjoy for years to come. Don’t forget to maintain your new DIY front porch roof to ensure it lasts for years to come. Consider this project if you are looking to improve your home’s curb appeal and functionality. With the right tools and planning, your DIY front porch roof will be a success. Happy building!
[See also: Porch Design Ideas]
[See also: How to Build a Deck]
[See also: Choosing the Right Roofing Materials]
