
Henna Hand Tattoo Tutorial: A Comprehensive Guide to Beautiful Designs
Henna, a natural dye derived from the henna plant, has been used for centuries to create intricate body art. One of the most popular applications is the henna hand tattoo, a temporary and painless alternative to permanent tattoos. This henna hand tattoo tutorial will guide you through the process, from selecting your design to caring for your finished artwork. Whether you’re a beginner or have some experience, this comprehensive guide will provide you with the knowledge and techniques to create stunning henna hand tattoos at home.
Understanding Henna
Before diving into the henna hand tattoo tutorial, it’s crucial to understand the basics of henna. Natural henna is a brown or reddish-brown dye. Black henna, often marketed as a quick and easy alternative, can contain harmful chemicals like paraphenylenediamine (PPD) and should be avoided as it can cause severe allergic reactions and permanent scarring. Always ensure you’re using natural, safe henna for your henna hand tattoo.
Types of Henna Paste
- Powdered Henna: This is the base ingredient. It needs to be mixed with liquids to create a paste.
- Pre-mixed Henna Paste: Convenient for beginners, but always check the ingredients to ensure it’s natural henna.
Materials You’ll Need for Your Henna Hand Tattoo
To begin your henna hand tattoo tutorial, gather the following materials:
- Henna Powder or Pre-mixed Henna Paste: Ensure it’s natural henna.
- Applicator Bottle or Cone: For precise application.
- Lemon Juice: To mix with the henna powder (if using powder).
- Sugar: To add to the henna mixture (if using powder) for better adhesion.
- Essential Oils (e.g., Lavender, Tea Tree): To enhance the stain (optional).
- Design Stencils or Inspiration: For guidance.
- Cotton Balls or Pads: To clean up mistakes.
- Paper Towels: For general cleanup.
- Sealing Solution (Lemon Juice and Sugar Mixture): To keep the henna moist and enhance the stain.
Preparing Your Henna Paste (If Using Powder)
If you’re using henna powder, follow these steps to prepare your paste:
- Sift the Henna Powder: Remove any lumps for a smooth paste.
- Mix with Lemon Juice and Sugar: Gradually add lemon juice to the henna powder, mixing until you achieve a smooth, yogurt-like consistency. Add a teaspoon of sugar to improve adhesion.
- Add Essential Oils (Optional): A few drops of essential oil can enhance the stain.
- Let it Rest: Cover the paste and let it rest for at least 4-6 hours in a warm place. This allows the dye to release.
Choosing Your Henna Hand Tattoo Design
Selecting a design is a crucial part of the henna hand tattoo tutorial. Consider your skill level and the occasion. Simple designs are best for beginners, while more intricate patterns can be attempted as your skills improve. Look for inspiration online, in books, or create your own unique design.
Design Considerations
- Complexity: Start with simple designs and gradually increase complexity.
- Placement: Consider the placement of the design on your hand.
- Personal Meaning: Choose designs that resonate with you.
Applying the Henna Hand Tattoo: Step-by-Step
Now, let’s get to the core of this henna hand tattoo tutorial – the application process:
- Clean Your Skin: Wash your hands with soap and water and dry thoroughly. Avoid applying lotions or oils.
- Apply a Stencil (Optional): If using a stencil, carefully apply it to your hand.
- Apply the Henna Paste: Squeeze the henna paste from the applicator bottle or cone, following your design. Apply a thick, even layer.
- Allow to Dry: Let the henna paste dry completely. This can take 30-60 minutes.
- Seal the Design: Apply a mixture of lemon juice and sugar to the dried henna paste. This helps keep it moist and enhances the stain. Repeat this process every 15-20 minutes for a few hours.
- Leave it On: Leave the henna paste on for at least 2-6 hours, or even overnight for a darker stain.
- Remove the Paste: Gently scrape off the dried henna paste. Avoid washing your hands with water immediately.
- Apply Oil: Apply a natural oil, such as coconut or olive oil, to moisturize the skin and protect the stain.
Tips for a Darker and Longer-Lasting Henna Stain
To maximize the darkness and longevity of your henna hand tattoo, consider these tips:
- Use High-Quality Henna: The quality of the henna powder or paste significantly impacts the stain.
- Keep the Henna Moist: Regularly apply the lemon juice and sugar mixture to prevent the henna from drying out too quickly.
- Apply Heat: Gently warming the henna with a hairdryer (on a low setting) can help deepen the stain.
- Avoid Water: Minimize contact with water for the first 24 hours after removing the paste.
- Moisturize Regularly: Keep your skin moisturized with natural oils to prolong the stain.
Common Mistakes to Avoid
This henna hand tattoo tutorial also highlights common mistakes to avoid:
- Using Black Henna: As mentioned earlier, black henna can be dangerous and cause severe allergic reactions.
- Applying Henna to Irritated Skin: Avoid applying henna to skin that is sunburned, broken, or irritated.
- Not Allowing Enough Drying Time: Rushing the drying process can result in a lighter stain.
- Using Expired Henna: Expired henna may not produce a strong stain.
Henna Aftercare
Proper aftercare is essential for maintaining your henna hand tattoo. Here are some tips:
- Avoid Soaps and Harsh Chemicals: These can fade the stain quickly.
- Moisturize Regularly: Keep your skin hydrated with natural oils.
- Protect from Chlorine: Chlorine can lighten the stain. Wear gloves when swimming in chlorinated pools.
- Exfoliate Gently: Avoid harsh exfoliation, which can remove the stained skin cells.
Henna Hand Tattoo Designs: Inspiration and Ideas
Need some inspiration? Here are a few popular henna hand tattoo designs:
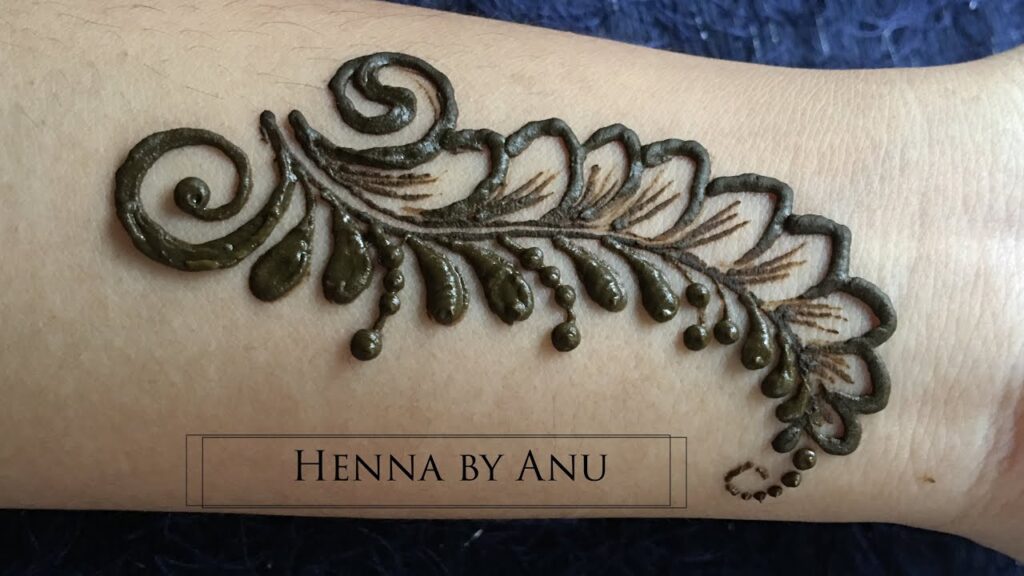
- Floral Patterns: Delicate and feminine designs featuring flowers, leaves, and vines.
- Geometric Patterns: Bold and modern designs with geometric shapes and lines.
- Traditional Mehndi Designs: Intricate and ornate designs with cultural significance.
- Minimalist Designs: Simple and elegant designs with clean lines and minimal details.
Experiment with different designs to find what suits your style. Remember, practice makes perfect!
Troubleshooting Common Henna Problems
Even with the best henna hand tattoo tutorial, you might encounter some issues. Here’s how to troubleshoot them:
- Light Stain: Ensure you’re using high-quality henna, keeping the paste moist, and leaving it on for a sufficient amount of time.
- Uneven Stain: Apply the henna paste evenly and avoid touching the design while it’s drying.
- Allergic Reaction: If you experience itching, redness, or swelling, remove the henna paste immediately and consult a doctor. This is especially important if you suspect black henna was used.
The Cultural Significance of Henna
Beyond its aesthetic appeal, henna holds deep cultural significance in many parts of the world, particularly in South Asia, the Middle East, and Africa. It is often used in celebrations such as weddings, religious festivals, and other special occasions. Understanding the cultural context of henna can add another layer of appreciation to your henna hand tattoo.
Conclusion
This henna hand tattoo tutorial provides you with the knowledge and skills to create beautiful and safe henna designs at home. Remember to always use natural henna, follow the steps carefully, and practice patience. With a little effort, you can enjoy stunning henna hand tattoos that reflect your personal style and creativity. Embrace the art of henna and explore the endless possibilities of this ancient tradition. Experiment with different designs, techniques, and aftercare practices to perfect your craft. Now that you’ve completed this henna hand tattoo tutorial, you’re well-equipped to embark on your henna journey. Happy tattooing!
[See also: DIY Temporary Tattoos]
[See also: Best Body Art Kits]
[See also: Guide to Safe Henna Practices]
